Overview
Lessons
Reviews
Instructor
Holiday Sale!   Save 75% AND get 2 Memberships for the Price of 1!  
Sign in
Preview course

How to Stylize Characters

with Kenneth Anderson
4.9 (97)
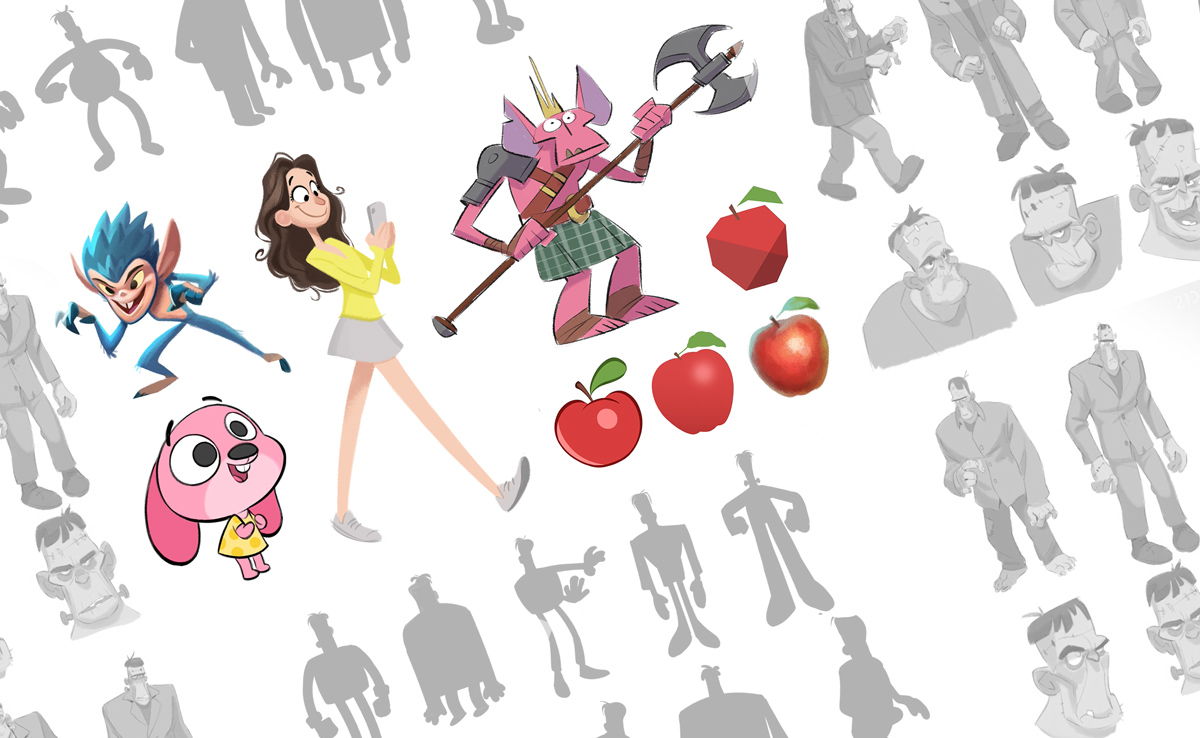
Discover how to create a character from scratch in two different art styles and learn art hacks to level up your drawings!
English, Spanish, 3 more French, German, Italian English, Spanish, 3 more French, Italian, German
2+
hours
24
lessons
Beginner to Intermediate
level
Kenneth Anderson

Your Instructor

Kenneth is a professional freelance illustrator and has worked with companies like the BBC, Brown Bag Films, Nick Jr. and others. His specialties are story-driven, character-based illustrations and designs for a variety of mediums, in particular children’s television.

All Courses
Get access to this course and 55+ more
$59 / year
$235 / year
left at this price!Save 75%
+
Gift an annual membership (Free)
Get Started
  • Cancel Anytime
  • 30-Day Money-back Guarantee

Only this course
$25 USD
Get Single Course
  • 30-Day Money-back Guarantee
Explore the course
2+
hours
24
lessons
Beginner to Intermediate
level
English, Spanish , 3 more
Languages
  • French
  • German
  • Italian
English, Spanish , 3 more
Subtitles
  • French
  • Italian
  • German

What you’ll learn

  • Create a character of your choice in two different styles
  • Understand what style is and why it’s important
  • How to make conscious and practical stylistic choices
  • Master painting and sketching techniques for different styles
  • Learn Kenneth’s unique method of designing to stay inspired and work efficiently
  • Get lots of handy techniques and digital tools for a faster, easier workflow
  • Discover the benefits of a Style Guide and how to create your own
  • Refine your characters, taking them from a thumbnail sketch to a polished, colored illustration
  • How style influences the end use and perception by audience
  • Gain a greater understanding of concept design and art direction
+ See more

Description

Do you find it difficult to develop your own art style? Do you want to learn how to create unique characters but don’t know where to start? Maybe you don’t even know what “stylized” means concretely?

Well, not to worry! Professional artist Kenneth Anderson will teach you everything you need to know about stylized character design.

“Stylization is reimagining the natural world in an expressive, unique way and there are countless ways to do that!”—Kenneth

In this in-depth course, Kenneth breaks down what stylization really means and how to choose a relevant art style for a project and draw consistently in that style. This knowledge will help you tremendously to develop your own style and to level up your illustration skills!

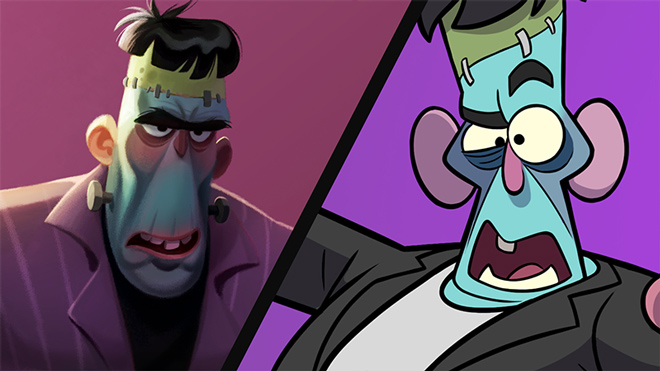
Look forward to a great balance of practical exercises and essential theory as you follow Kenneth’s step-by-step design process for creating Frankenstein’s monster in two very different styles. Explore the distinctive elements of each one, as Kenneth shows you how to apply them to your own artwork, using clear examples.

You will also discover a TON of nifty tips, cool tools, and handy techniques to simplify your workflow, make your artwork look better, and speed up your creative process! These tips include: lining up elements to unify your design, flipping the canvas to change your perspective, quick ways to create pose variations, the importance of ‘drawing through’, and a whole lot more!

At the end of this course, you will feel much more confident in consolidating your own art style and illustrating fun, unique characters that you can be proud of!

+ See more

Who is this course for

  • Those eager to learn how to design in different styles
  • Those wanting to develop a good design process for illustrating characters
  • Artists interested in picking up new skills for a faster, easier workflow
  • Illustrators looking to improve their concept design skills and knowledge
+ See more

This course includes

  • 2+ Hours of on-demand videos
  • 5 Assignments
  • List of recommended brushes
  • Process and Bonus images (JPG)
  • Certificate of Completion
+ See more

Used in course

+ See more

What you'll need

  • Some previous art experience needed
  • Just a paper/sketchbook and a pencil
  • Digital drawing software such as Photoshop or similar (see examplesAffinity Photo, ArtRage, Artweaver, Astropad, Clip Studio Paint, Corel Painter, Krita, Inkscape, IbisPaint, GIMP, Rebelle 4, Photoshop, Paintstorm Studio, Procreate, MediBang Paint, SketchPad, SketchBook, TwistedBrush, Vectr...)
+ See more

Lesson Plan

with Kenneth Anderson
Expand all sections
00

Introduction

05:38

Start your Subscription to continue watching
Start your subscription to get access to this class and 55+ more on 21 Draw
Get Started

Get to know Kenny, your instructor, and a bit about his background and expertise.

He will give you a summary of the great content in store for you in this course! He will also explain what you will need to follow along with ease. Don’t worry, it’s very simple!


0.1
Introduction
02:34
0.2
Tools & Brushes
02:31
0.3
Task 1
00:33
01

What is Style?

14:38

Start your Subscription to continue watching
Start your subscription to get access to this class and 55+ more on 21 Draw
Get Started

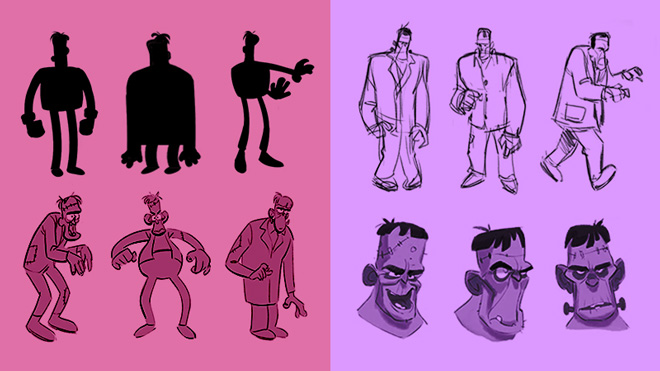
This lesson will focus on the all-important theory of stylization. You’ll get a good grasp of what style actually is and why it’s so important to maintain when illustrating.

Different styles communicate different messages. So inconsistent design can make things confusing for your audience.

You will see various examples of stylized characters for different purposes and learn about target audiences, intended media usage, and tone of the story or message.

Kenneth will also show you what a style guide is and how to create one yourself. As your assignment, you will choose a character to design in two different styles. Fun!

1.1
What is Style?
04:19
1.2
Style, Story & Context
05:24
1.3
Style Guide (Style A)
02:16
1.4
Design Rules (Style B)
02:11
1.5
Task 2
00:28
02

Rough Sketches

36:14

Kenny does rough sketches of his Frankenstein characters

Kenny will start out with rough sketches of his character in two different styles:
– Style A (for a 2D animated TV show for kids)
– Style B (for a 3D animated feature film for older audiences)

He will give you guidelines and tips to follow as you work and explain why they are so useful. Tips such as working with shapes, sketching quickly, starting in black, jumping back and forth between sketches and much more!

His approach for creating thumbnail sketches is different for both style types and you are guaranteed to find it fascinating and very helpful in designing your characters!

2.1
Style A
16:31
2.2
Style B
15:48
2.3
Roughs Comparison
03:19
2.4
Task 3
00:36
03

Refined Sketches

24:38

Kenny refines his Frankenstein sketches

Welcome to Stage TWO! You will pick out your two favorite sketches from stage one, tweaking and exploring them further. This includes cutting and pasting elements together, and patching together your own Frankenstein! 🙂

Keep the parts that you like. Discard the ones that aren’t working. This is also the stage to play around with color schemes (always a joy!). After that, Kenneth takes you through specific steps to prepare the thumbnails to be shown to a client.

To round up, he explains the different design choices for each style and the reasons he chose them.

3.1
Style A
11:51
3.2
Style B
09:45
3.3
Refining Comparison
02:27
3.4
Task 4
00:35
04

Final Art

01:00:01

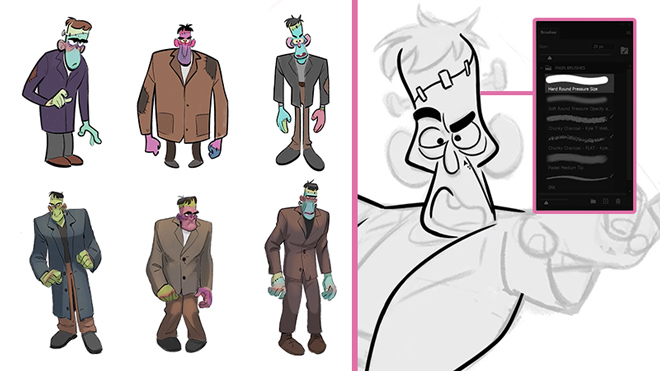
Working on clean lines, colors, lighting and shading, and final touches.

In this final lesson, look forward to learning a TON of amazing tips and tricks to assist you in your creative process! Kenneth takes both his character styles to the finalized illustration stage, working on clean lines, colors, lighting and shading, and final touches.

You’ll discover great digital tools such as the Warp Tool, Compass Tool, Brush Smoothing, Canvas Flip, and others to help in creating clean, smooth line art, drawing more comfortably, creating variations quickly, and much more!

Kenneth will also demonstrate cool ‘cheat’ methods that professional artists use to make their digital drawing process less tedious and much faster! You’ll have a whole set of new handy skills after this!

To round up, he will show the clear differences and similarities between both styles, summarizing the main principles to take home from this course.


4.1
Posing (Style A)
08:56
4.2
Line Art (Style A)
11:07
4.3
Colour (Style A)
07:23
4.4
Posing (Style B)
06:29
4.5
Colour Blocking (Style B)
09:47
4.6
Polish (Style B)
12:08
4.7
Final Comparison
03:37
4.8
Task 5
00:34

Student Feedback

97 customer reviews & ratings

4.9

Course rating

Log in to leave a review or rating.
5 star
91 %
4 star
8 %
3 star
2 %
2 star
2 %
1 star
0 %
Best Suited for
Intermediate
The level is determined by a majority opinion of students who have reviewed this class. The teacher's recommendation is shown until at least 5 student responses are collected.

(Based on 97 reviews)

Most Liked
Great step-by-step process 81
Clarity of Instruction 74
Helpful Examples 66
Showing 10 reviews of
97
reviews & ratings
CB
Colin B.

1 year ago

Verified Purchase
I found the pacing very reasonable. The class is not meant to show how to draw, for anyone expecting that, but rather how to use your skills to design a character. The fact that he used the same character but modelled it for different media and intentions was very educational and gave me a better th
+ Show more
ought process on how I might approach my own characters going forward.
I recommend it for All levels
4 people found this helpful
ADELIA V.

1 year ago

Verified Purchase
Amazing class! The teacher is very focused, he explains concepts in a fluid way, it's not boring at all! I also like that he gives us the reason behind every choice!
I recommend it for Intermediate
LT
Lafe T.

1 year ago

Verified Purchase
Great work and very well explained.
JF
Joshua F.

1 year ago

Verified Purchase
I like to watch these things all the way through first time round, rather than follow along. I take some notes, and generally want to get a sense of the process before trying to jerkily implement it myself. And Kenneth didn’t disappoint. Pros: - each step for both style briefs was clearly worked th
+ Show more
rough, with important ideas highlighted in the narration - he talks in a very clear voice, at a generally even speed so good if you’re a second-language English speaker unpracticed with the delights of the Scottish accent. - he very clearly indicates his preferences and highlights them as such. What is important is the result, not how you like to get the result. So while his polished line art method gives me bad dreams, I’m more comfortable with adding some smoothing to the brush and treating it like real ink. Different strokes for different folks ;-P - the contrast between the two styles is excellent. It shows as he notes in his final comments that what makes a style a style is the opinionated application of consistent design choices in order to get a particular result. I’m very curious about a process where the story is the same but the elements of the context are different. Cons: - Some may have challenges with the Scottish accented English but he is very good about enunciating - the final Style B polish video is largely just a time lapse though it does contain some great information. I felt it could have had a bit more narration in the middle, even if it’s just keeping us up to speed on the key points there for more beginner painters, even though painting itself is outside of the scope of the course by more than a wee bit. - the resources could be better. For instance: - an outline or syllabus with what is demonstrated refined as bullet points - he uses some terms that could stand defining or links to good definitions: eg tie-down, clean up, transparency lock - I really like infographics: this process is pretty much the design spiral, an iterative process. The subtle fact that he’s repeating things just at different levels of priority and hierarchy, that might be easily missed by a real n006. All in all, if you need a process, as I did, this is one of the best tutorials I have seen and while it has some downsides, they are really not a big deal for me. 5/5 recommend that beginners and even some intermediate creators, whether aspiring character designers or not, will benefit from this course. Thanks Kenneth!
I recommend it for Beginner
MM
Maria M.

1 year ago

Verified Purchase
I just love Ken Anderson's style and classes! It made me a bit sad though when he said at some point that he wouldnt show these sketches to art director yet, because for me it would be a dream to have anything remotely as good in my portfolio haha
I recommend it for All levels
SA
Samantha A.

1 year ago

Verified Purchase
This was a great course! I've been trying to find a way to spice up my character designs and this was just the inspiration I needed.
I recommend it for Intermediate
RD
Rick D.

1 year ago

Verified Purchase
Yet another great course by Kenneth A. This course gives such great examples of two very different styles. It gives you the ability to enter into the very different thought process and techniques for each style while still holding to solid design principles in both examples. Thank you, Kenneth!
I recommend it for Intermediate
SA
Sarah A.

1 year ago

Verified Purchase
A perfect case study course. I learned a lot!
AC
Art C.

1 year ago

Verified Purchase
Its a best step by step tutorial! Thank a lot
PJ
Patricia J.

1 year ago

Verified Purchase
This set of courses is excellent. Although I have studied art before it has been a long time since I have drawn anything. working through the beginner to advanced levels the courses guide you through and give pretty amazing results
I recommend it for All levels
See more reviews

About the Instructor

Kenneth Anderson
Illustrator & Character Designer 6 courses

Kenneth is a professional freelance character designer with 14+ years experience. Based in the UK, he has worked with companies like the BBC, Disney, Tandem films and Axis Animation. He also worked on Sylvain Chomet’s Oscar nominated film “The Illusionist” and the French feature Titeuf: Le film.  His specialties are story-driven character-based illustration and design for a variety of mediums, in particular children’s television. In his spare time, he enjoys creating characters, illustrating magazines and making games.


Follow Kenneth on

Full bio

Bonus Offer

Frequently Asked Questions

What is 21 Draw?

21 Draw is an online learning community where students of all skill levels can learn how to be a better artist. Our contributing artists and instructors are the best in the world.

Our streaming platform on www.21-draw.com makes it possible for anyone to watch hundreds of video lessons by industry legends who have worked for Disney, Marvel, DC, Dreamworks, Pixar & more. A membership gives full access to our streaming platform.

On books.21-draw.com you can buy our popular learn-to-draw ebooks and physical books, separate from the courses, and they too are also delivered to you by the heavyweights of the art industry.

162 people found this helpful
Was this answer helpful?
Yes
No

What is included in the membership?

Membership includes unlimited access to all 55+ courses taught by the world’s best artists PLUS new courses as they are released.

Each class includes 10-20 video lessons that are 7 minutes long on average. Most classes include exercise sheets, assignments, and layered PSD or PNG files.

Some classes include the ability to chat with the instructor in a public forum, e.g. if you want feedback on your artwork.

234 people found this helpful
Was this answer helpful?
Yes
No

Do I receive a certificate after I complete a course?

Yes! When you complete a 21 Draw course, you will receive a certificate of completion, which you can download and share with your friends, relatives, co-workers, and potential employers!

175 people found this helpful
Was this answer helpful?
Yes
No

Are these online or offline courses?

21 Draw courses are on-demand (pre-recorded) video tutorials that you can watch online with any digital devices anytime and for an unlimited number of times! This means you can easily watch (and rewatch) them at your own pace and convenience.

437 people found this helpful
Was this answer helpful?
Yes
No

Can a beginner follow along?

We have classes for all levels, even for those with zero drawing experience. In general, artists at all levels can benefit from these courses—whether beginner, intermediate or advanced.

314 people found this helpful
Was this answer helpful?
Yes
No

Do the courses teach digital or traditional art?

Many lessons in our courses apply to both digital and traditional art. In a few tutorials, digital drawing software, e.g. Photoshop or Procreate for iPad is required. However, for the majority of lessons it is more about the underlying concepts and all that is needed is a pen and paper.

280 people found this helpful
Was this answer helpful?
Yes
No

Can I download the course videos?

You can download the course resources (exercise sheets, assignments, PSD files, etc.) from the site, but you cannot download the video lessons to your computer.

287 people found this helpful
Was this answer helpful?
Yes
No

How much does a membership cost?

Normally it costs $235/year. However, there is a special sale running now for a limited time: Save 75%! This means you can get an annual membership for just $59 USD/year.

If you purchase the annual membership at a discounted price, it will remain at that price for each consecutive year, so long as your membership is not cancelled.

511 people found this helpful
Was this answer helpful?
Yes
No

How does the 30-day guarantee work?

If for any reason at all you are unhappy with our courses or feel it isn’t what you are looking for—then just fill out this form or email us at [email protected]. We’ll be more than happy to give you a full refund within 30 days of your first purchase. No questions asked. Just a guarantee you can trust.

239 people found this helpful
Was this answer helpful?
Yes
No

How do I cancel my membership?

You can easily cancel your membership renewal on your My Account page. Follow the prompts to cancel (Billing > Change Plan > Cancel Membership) and your membership will immediately be terminated. Please note: Refunds ONLY possible within 30 days after the date of purchase.

If you have more questions, please check out our Knowledge base or write to us here. We’re happy to assist in any way we can!

206 people found this helpful
Was this answer helpful?
Yes
No

More from 21 Draw

About 21 Draw

21 Draw offers online courses and books on how to be a better artist for students of all skill levels. Our contributing artists and instructors are the best in the world.
Explore Courses & Books
Preview course
Watch the trailer
Access to all courses
Get access to this course and 55+ more
$59 / year
$235/ year
left at this price!Save 75%
+
Gift an annual membership (Free)
Get Started
(including this course)
OR
$25 USD $40 Single Course
Lifetime access
No commitments
Cancel Anytime
30-Day Money-back Guarantee
Still not sure?
Check out our FAQ
Start your Subscription to continue watching
Start your subscription to get access to this class and 55+ more on 21 Draw
Get Started
Kenneth Anderson How to Stylize Characters
Get all-access
Save 75% on annual membership + Give one for FREE. Get started