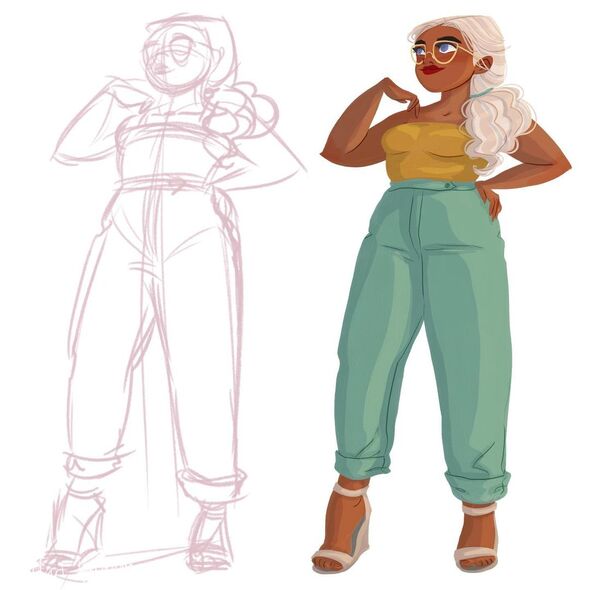
Drawing a body is difficult – even daunting – for many beginners.
Trying to create an anatomically correct figure is not always easy. But don’t worry, in this detailed guide, we will share some simple methods to make drawing a body more achievable.
The body is integral to many aspects of artmaking; you need it for any character you might want to create or even in environmental artworks with people in the background.
So studying and practising how to draw a body is important. You want to feel comfortable creating stylized figures in whatever poses and designs you would like.
The body is difficult to capture through art as there are many components to consider. You must remember to engage the fundamentals of art, specifically considering form, structure, and composition – as well as considering proportions and figure anatomy, body movements, and stylization.
To make this scary process easier to approach, we have broken it down into some simple steps. As well as this, you could try out our specialized course, ‘Figure Drawing For Beginners’.
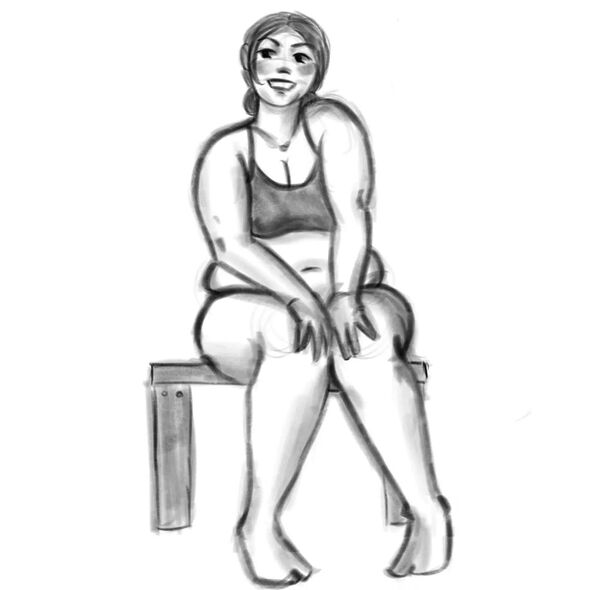
Before you can begin adding personality and stylization to the bodies your draw, it is integral to understand the proportions of human anatomy.
Getting the body proportionally correct can be difficult, but there are a few shape-work techniques you can use to sketch the human body.
These will help you learn how to sketch a very front-facing body, but luckily they can still be used as a basis for drawing other angles as well.

First, you have to consider the body as it is in real life; a connection and chain of joints. Drawing the body becomes easier when you break it down into these parts.
There is a general rule, devised during the Renaissance, that the ideal human body is eight heads long.
This rule helps you to map out the general shape of the human body. However, this rule can make adding more flow to your body difficult.
As you move on to creating more expressive characters, you can become more liberal with using eight equal parts, changing around sizing and angles of these guidelines to better suit your character’s body language.
But, to begin with, we will plot eight equal parts. You can also add a vertical line of flow through your eight segments, showing the posture and positioning of your body’s figure. This almost acts like your drawing’s spine.
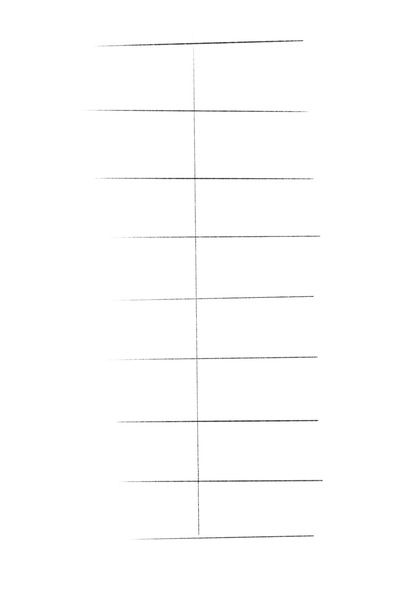
The eight parts represent different elements of the human body;
Each body is extremely different, and therefore some of these steps may vary depending on what you are trying to achieve. Additionally, the male and female body proportions have a different overall shape, meaning that the linework for each will differ.
To begin with, draw the head in the first segment. This is typically an oval shape; however, you can adjust the proportions to match whatever figure and body type you want to achieve.
Starting with the head may feel unnatural, but it really helps you get the flow of the body, as you work your way down from head to toe.
Even when not following the Renaissance eight-head rule, I still like to start with plotting down the head as it is a good starting spot and removes any complications, allowing you to immediately understand the sizing and proportions of the body you will be creating.
You could also check out our detailed guide on the Loomis method for drawing the head.
For a male figure, the head may have a square jaw shape, to really emphasize the bone structure immediately within your drawing! The neck will also be quite broad.
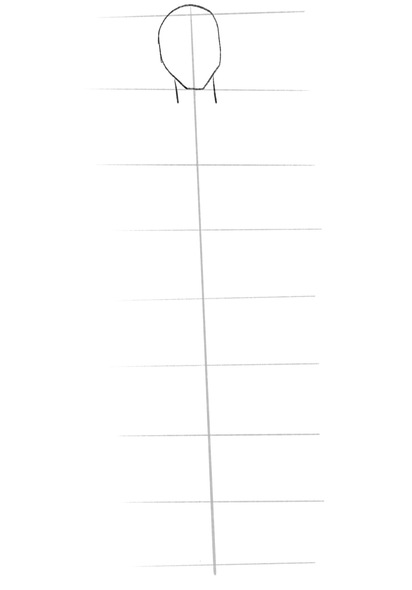
For a female figure, the head is a softer egg-like shape, with a less harsh jaw than a male figure. The neck on the female body will be a slimmer connection.
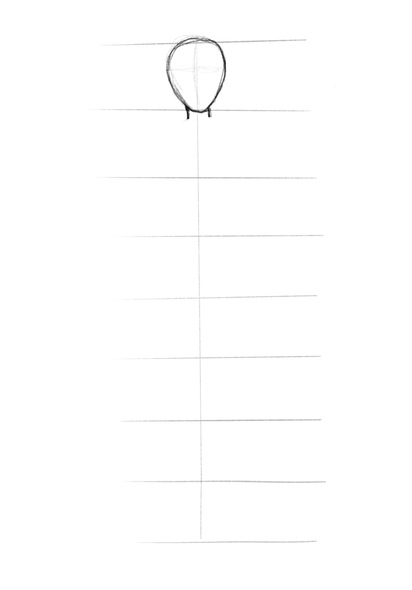
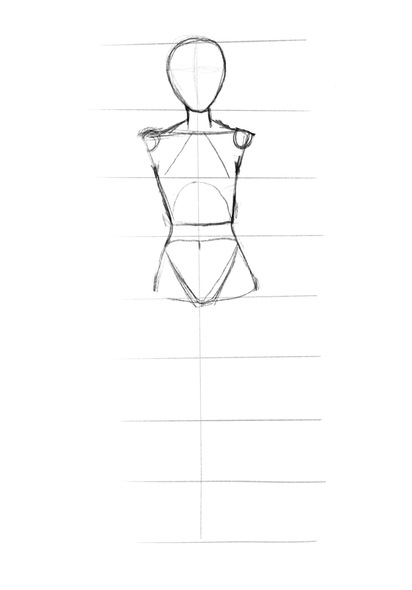
For sketching beneath the head, you can begin by drawing a sort of trapezium shape that takes up the space in parts two and three of your segments. This shape represents the chest and stomach area of the body.
The top-right corners of the trapezium shape show where the shoulder joints sit, you can draw small circles to represent this notion. You can also draw an oval shape in the trapezium to highlight where the rib cage would be.
(PRO TIP)
As the male body typically has broader shoulders, keep the top half of the trapezium wide. Also, the male figure has a less curvy waist, so make sure the bottom half of the trapezium does not taper inwards too much.
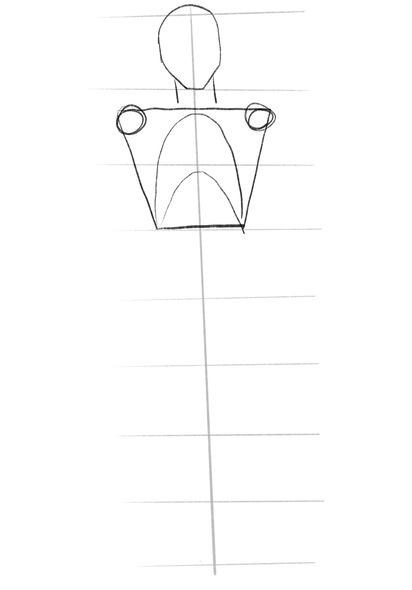
A typically female shape will taper more inwards towards the bottom half to highlight the curves of the waist.
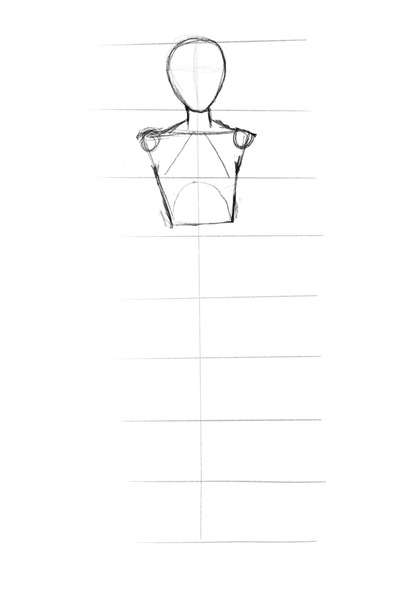
Beneath this first shape, you can now draw a smaller trapezium in the fourth segment. This shape marks out the placement of the body’s pelvis area. Within this trapezium shape, you can also add an upside-down triangle shape to map out the body further.
Now that the upper and lower half of the torso have been drawn create connecting lines between them. This will be a sort of curve (or more straight line for a male body) to reveal the waist of your body.
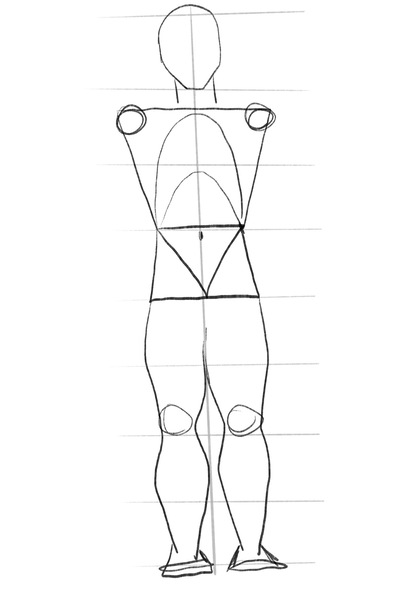
For a male body, create a sort of square shape that only just tapers outwards towards the end of the body to establish smaller hip bones.
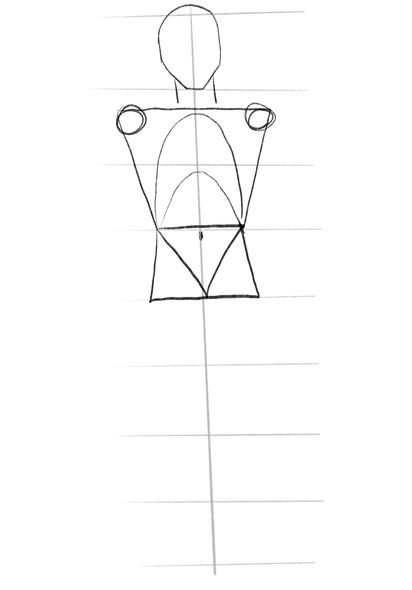
For a feminine body type, this trapezium will be vertically flipped and smaller in comparison to the one above! This is to create a sort of hourglass figure; however, you can adjust the size and dynamics of this linework to create whatever body type you wish to achieve.
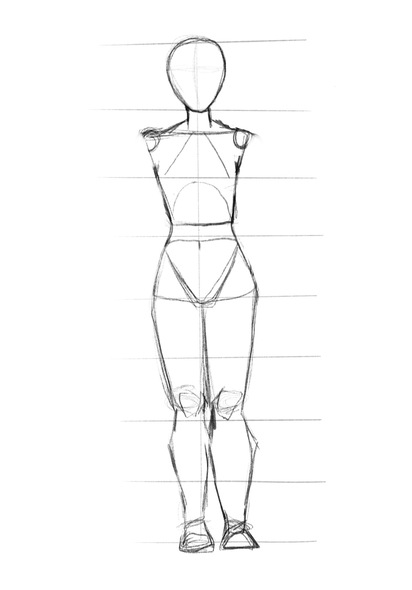
It’s time to move on to the legs! This step can be achieved by plotting out the shapes that you want, generally placing the thighs in the fifth and sixth segments, and the calves and feet in the seventh and eighth.
Additionally, try marking out the knee joint at around the sixth horizontal line marker.
You can then connect the legs to the hips, making them flow smoothly into the body.
When drawing a male body, the legs may be more similarly sized to the hips. This would mean removing any curve from the waist, instead creating a more parallel and straight look, making the hips, thighs, and calves appear as a more similar size; apart from the skinnier area around the knees and the ankles.
For a female body, the upper thighs would connect with the hips at a wider, more curvaceous angle. Also, the thighs will most likely be thicker than the calves.
To draw the arms, you will look back to the shoulder markings you made earlier! This reveals where the arms will begin. Typically, the upper arm should take up about one and a half segments, with the forearm only filling one, and the hands taking up roughly half a segment.
For a character standing completely straight and front-on, this would leave the hands hitting a bit above your drawing’s knees to keep everything in proportion to the body!
Male arms will stem off of broader shoulders and may have half more muscle definition.
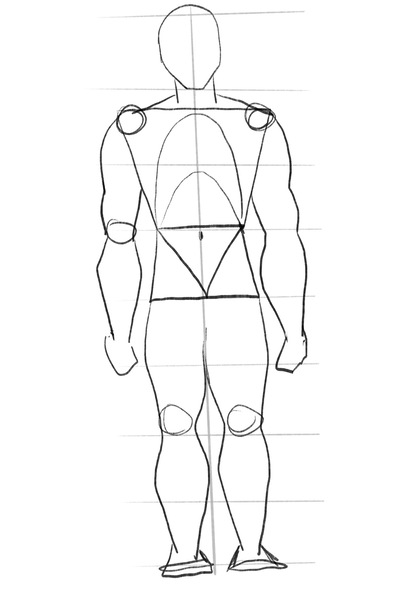
These arms will most likely be tighter to the body, due to the less broad shoulders.
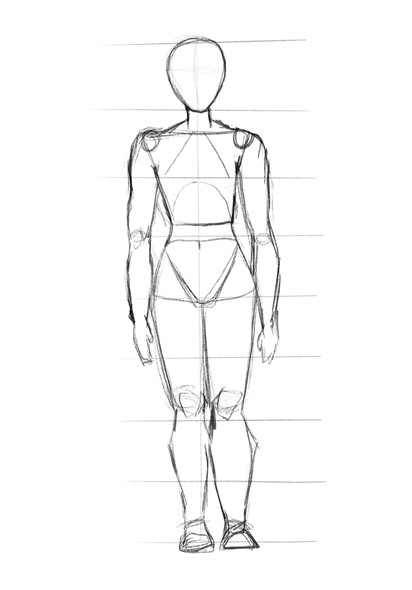
After following these basic guidelines, you will have an outline of a human figure, including all the significant features and joints that characterize the body.
This is an easy method to correctly capture the human body through proportionally correct anatomical linework.
However, now that you have an understanding of where the main joints and connections of the body are, you may want to endeavor to add details outside of just a simple mannequin-like sketch.
You can do this by overlaying linework with more flow and human-like features.
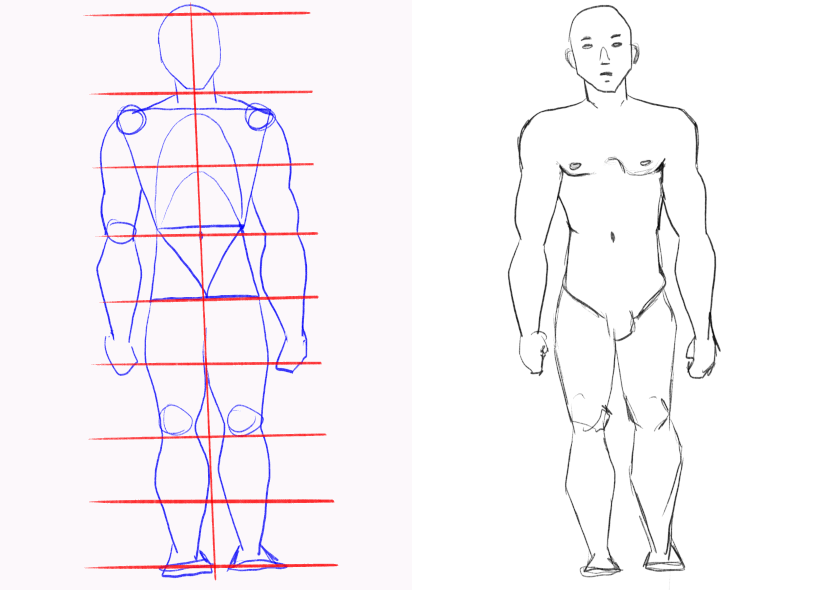
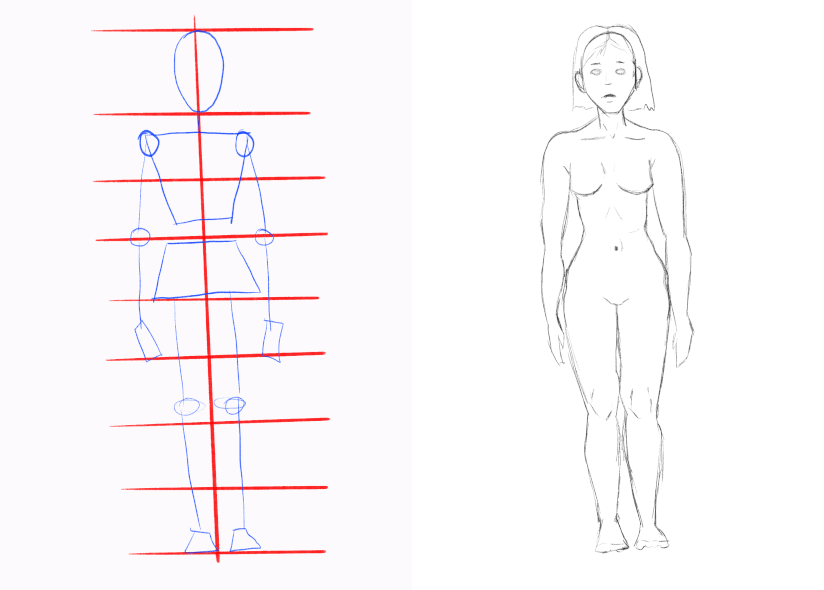
To gain a thorough understanding of how to draw bodies in many different ways, such as gesture drawings or action shots, it is important to practice, practice, practice!!!
Get out some reference images and try to use and adapt the eight-head rule to help map out your proportions. Studying the human form through visuals is one of the most important ways of learning how to draw a body.
Make sure you try several different poses and angles to deepen your understanding of the body!
There are many different ways you can practice, using online references, live references, or even your imagination if you are feeling brave! All of these are extremely important steps in helping you get really comfortable with drawing the human figure.
As you experiment with poses, you can try out new things like maybe someone sitting down, dancing, or lying down. You can also try out different body shapes and types, maybe your character is short, or abnormally tall.
When you are practicing and sketching, you can create any body shape you want, using the general eight-head rule, and following some reference images!
If you are feeling particularly stumped as to how to draw certain body movements, you could even try tracing your reference image and studying the linework to really understand the flow and positioning of the human body.
If you use Procreate for your drawings then don’t forget to check the best online Procreate courses here and our guide on how to trace on Procreate. We also have some amazing guide on Procreate tips that you might like.
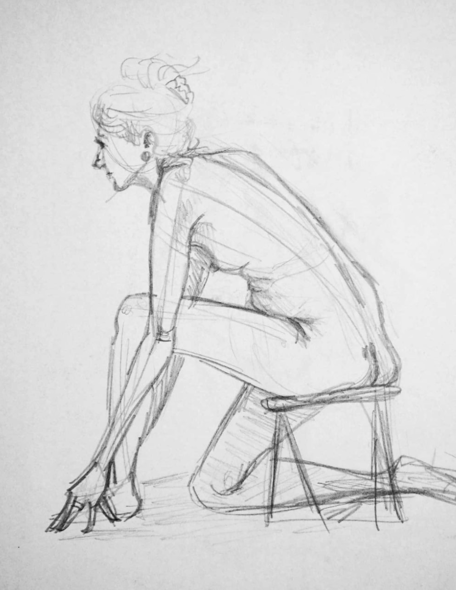
Gesture drawing is a great method of practice as it is a significant exercise that can help you fully grasp how to draw a body.
The practice of gesture drawing involves making a quick and simplified sketch of your subject matter (typically a human body).
When gesture drawing, you are trying to plot down the main elements of the figure in quick and simple linework to capture the general feel of the body and the pose you are trying to communicate.
This is very helpful in allowing you to get a feel for the flow of the body and how to visually communicate body language, gestures, and poses, in a very simplified manner.
To do gesture drawing, all you really need is a pen and paper, or maybe a drawing tablet or an Apple Pencil and iPad, and some sort of reference.
This can simply be an online reference image, or if you wanted to try gesture drawing the traditional way, you could use a live model—maybe even try to find a class to attend.
Then, all that’s left to do is start sketching the body as simply and quickly as you can, ignore specific details, and instead try to draw the flow and linework of the body.
Remember to give yourself a time limit, ranging from half an hour to under a minute.
As well as this, don’t use an eraser. Just let your pencil flow as you try to capture the essence of the body.
This time limit and lack of eraser will force you to really try and quickly plot down the main elements of the human form, making you more easily grasp any important details and therefore providing you with a better understanding of how to draw a body.
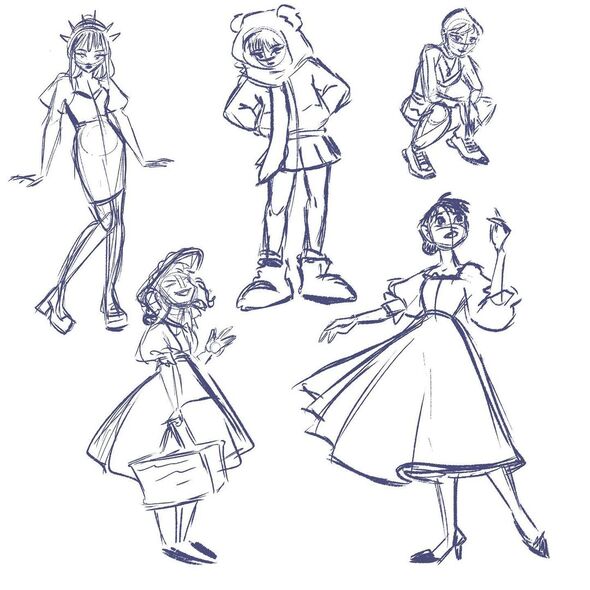
Now that you know how to draw a body using these helpful techniques, you may want to know how to make these drawings feel like your own.
Stylization involves you finding your specific and individual style of drawing, and sticking to it consistently throughout your artwork. There are countless ways of creating art, and everyone will find their own style through practice.
One method you can use to find your style is to test out different ways of drawing a body until you find something that works for you, adapting it until it becomes your own.
Experiment with linework; try different sketching styles, like using harsh confident linework or smooth-flowing lines.
Because styles are so limitless, there are so many methods you can use to learn how to stylize your body; an especially effective method would be to check out our ‘How to Stylize Characters’ course.
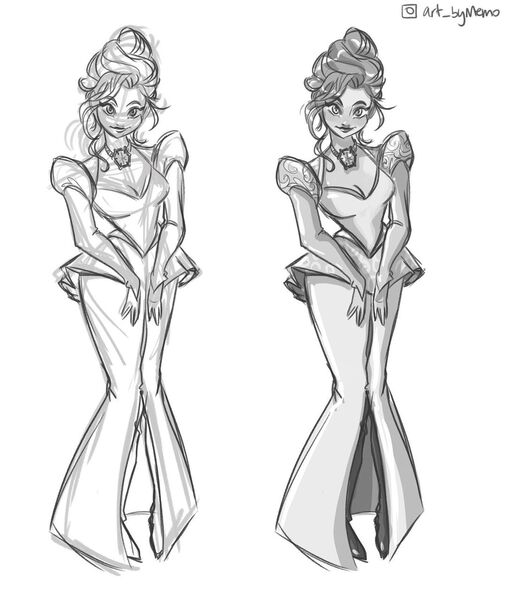
Drawing a body is a difficult task, especially because there are so many different components to consider.
However, if you remember to break it down into sections, thinking of the body as a series of joints, muscles, and bones, you can begin to wrap your head around how to draw a body.
Hopefully, after practising and studying the human body, you will feel comfortable and familiar with this important yet difficult type of drawing.
By following the steps and practices above, you can now go and create whatever character you wish to, using figure drawing, anatomy, and proportions to create an interesting and stylized human body!
Emma is an Australian Freelance Writer, eager to create informative and interesting writing which expresses her creative passions. Emma is currently studying Fine Arts at the Queensland University of Technology.
Is so cute
Cool
I love it so much
Ty 😁
Thank you for this. It's simple, to the point and easy.
that good I am using the man for my competition but mine is nothing like urs
Drawing is hard this will help my other talents along with step by step displays.
so true
Really awesome!
O meu ficou lindo adorei fiz todos
O meu ficou lindo adorei fiz todos
I was wondering if you could make more,like how to draw animals? thank you!
Oooh good idea
I had to show my daughter and she loved this please make more you are a great artist
ReplyThis Helped me draw so much better!! Thank you so much ❤️
ME TOO ❤️🤍💜💚❤️🤍💜💚 POST MOREEEEEE
hola yo soy una principiante y me salió mejor de lo que espere en mi escuela me hacen buling por que todas las chicas dibujan mejor que yo y no sirvo para nada pero después de este dibujo espero que ya no me agangrenándooslas buling.
I hope this helped you as much as it helped me Mia and i bet it turned out wonderful!! :)
It may not come out right the first time. That's okay. We learn more from our failures than we do from our successes. As with everything in life, consistency is key.
Replythank you so much but can you do some more like the 2nd to last but more. this helped me out so much thank you.
ReplyEven the simplest sketches were hard for me…it’ll take time but thanks for the guide, I can’t wait to see my improvement over time although I get frustrated easily
ReplyThis helpedd sooo much.I used to struggle and this is amazing.Plss do more poses on this!!
ReplyTrop brouillon
Very beautiful,I love it
Your art is wonderful and really good. Could you please do a hand tutorial?
ReplyMe encantó cómo quedó el resultado final quedó increíble no puedo creer que haya quedado así este paso a paso quedó súper súper me encantó
ReplyTrès contente d'avoir vu votre post....je me suis arrêtée de dessiner et du coup besoin de reprendre ...merci très bon Exercice...
ReplyI think that it really improved my drawing skills, but could maybe add in how to draw hair?
Thanks for your feedback. Great topic!
It's a very cool drawing to reproduce and very beautiful I love it.
ReplyI usually don't draw good, but when i followed these steps i drew perfectly
Reply