
Maria Lia Malandrino is an illustrator and visual development artist from Turin, Italy. Since 2017 she has been working for such brands as Disney and Oxford University.
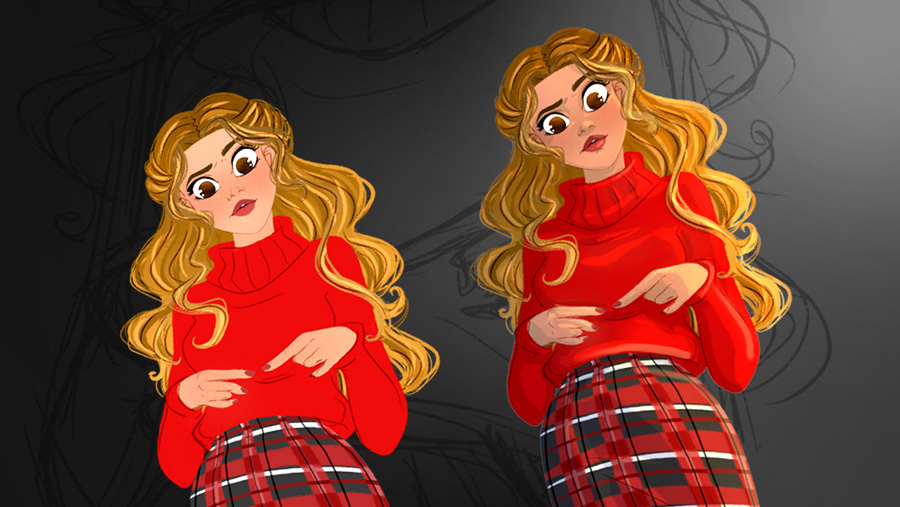
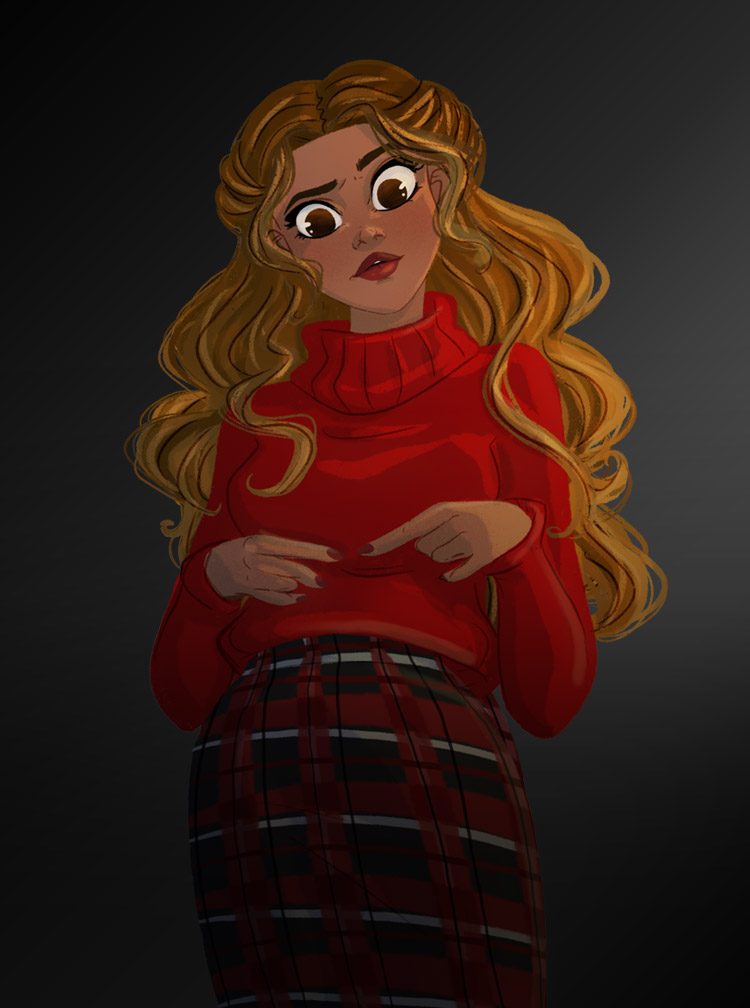
Lighting and shading may take up only about 20% of the time you put into a drawing, but they will impact 80% of how that drawing is perceived!
Good lighting and shading can turn a simple doodle into an eye-catching drawing, drawing the viewer’s eye to specific areas of your artwork and making the colours really pop!
In this course Maria shows you practical examples using the Procreate app on the iPad Pro, but the general rules are applicable to any digital painting software and tablet.
You will review some theories behind shading and lighting and will have fun practicing with different types of shading settings, lighting setups and gradients.
Note that to take this class you should be familiar with digital tools like Procreate app and other digital drawing elements like sketching, flat colouring and layers. If you need brushing up on some of them, we highly recommend you first take Maria’s course “How to Draw a Cartoon Character“.
Assignment: Create a beautiful artwork with an interesting lighting setting
This is your chance to experiment with different lighting settings!
If you wanna post your results on social media don’t forget to tag Maria for a shoutout! You can find her at:
Good luck, but especially, have fun!
Maria Malandrino introduces herself and her new tutorial on shading and lighting, a drawing stage that can have a huge impact on the viewer’s perception of an artwork!
After reviewing some theories behind shading and lighting, Maria will show you how an artwork can be affected and improved by good lighting. She will also teach you how to use layers and blending settings in Procreate to achieve the results you expect.
In this tutorial Maria will use Procreate app on iPad Pro, but the basic principles of the course hold good for any other tablet and drawing software.
Before getting started you first need to set up your canvas in Procreate.
In this lesson Maria will show you how to create the type of canvas that best suits your needs in terms of shape, size and DPI (to ensure your image prints sharp and crisp).
Then, you will be able to import a flat colour image into your canvas or use the available psd file. You can also sketch something out on the canvas right before getting started.
1 practice character PSD with sample lighting layers.
Before practicing with shading and lighting it’s better to review some basic rules on how a shadow is formed. In this lesson, Maria illustrates two main types of shadows, the cast shadows, and the form shadows. She also provides some examples of how they appear and differ, depending on the source of light that generates them.

Here Maria will pick one of her own artworks as reference image to demonstrate the cast and form shadows.
She will guide you through the steps of duplicating layers, creating a clipping mask and using blending modes in Procreate. She will also show you how a little bit of planning can help you stay on track throughout the entire creative process.
By watching this tutorial you will learn how to draw different types of shadows on a character’s body, to select the best tones and brushes, to modulate the opacity and change the shading settings according to the light source and the time of day.

In this lesson you will learn how to make the most out of a character in a scene using a common photographic setup called 2-point lighting. You will get familiar with lighting principles and concepts such as the key light, the fill light and the rim light (3-point lighting), and will see how they are used in some practical examples.

Now it’s time to watch Maria’s demo and practise with the 2-point and 3-point lighting setups.
In this tutorial Maria will show you how to use layers and blending settings (Overlay) in Procreate to draw the light on the areas that are reached and variously affected by it.
You will learn how to use complementary colours, adjust opacity, erase and refine some areas of your artwork to achieve the desired effect.

In this tutorial Maria is going to use a close-up of the character she created in her course “How to Draw a Cartoon Character” to practice some examples of dramatic lighting, i.e. a type of lighting that adds to the visual interest of a portrait or an artwork.
Using layers, blend mode types and adjustment tools in Procreate, Maria will demonstrate special lighting setups that make a character pop out or draw attention to a detail, such as light coming from the side or from below and obstruction.
7 dramatic light example pictures (JPG) included

In this final lesson you can see how Maria creates and uses gradients to alter the perception of the time of day, to set the desired mood and atmosphere of the scene and to add more colour variation to a character.
Course rating
(Based on 192 reviews)

Maria is an illustrator and story artist from Turin, Italy. She has a BA degree in Magazine Publishing from the University of the Arts London, has studied Traditional Animation at the International School of Comics in Turin and attended a masterclass in Storyboarding at the online school CGMA.
Follow Maria on
Full bio21 Draw is an online learning community where students of all skill levels can learn how to be a better artist. Our contributing artists and instructors are the best in the world.
Our streaming platform on www.21-draw.com makes it possible for anyone to watch hundreds of video lessons by industry legends who have worked for Disney, Marvel, DC, Dreamworks, Pixar & more. A membership gives full access to our streaming platform.
On books.21-draw.com you can buy our popular learn-to-draw ebooks and physical books, separate from the courses, and they too are also delivered to you by the heavyweights of the art industry.
Membership includes unlimited access to all 60+ courses taught by the world’s best artists PLUS new courses as they are released.
Each class includes 10-20 video lessons that are 7 minutes long on average. Most classes include exercise sheets, assignments, and layered PSD or PNG files.
Some classes include the ability to chat with the instructor in a public forum, e.g. if you want feedback on your artwork.
Yes! When you complete a 21 Draw course, you will receive a certificate of completion, which you can download and share with your friends, relatives, co-workers, and potential employers!
21 Draw courses are on-demand (pre-recorded) video tutorials that you can watch online with any digital devices anytime and for an unlimited number of times! This means you can easily watch (and rewatch) them at your own pace and convenience.
We have classes for all levels, even for those with zero drawing experience. In general, artists at all levels can benefit from these courses—whether beginner, intermediate or advanced.
Many lessons in our courses apply to both digital and traditional art. In a few tutorials, digital drawing software, e.g. Photoshop or Procreate for iPad is required. However, for the majority of lessons it is more about the underlying concepts and all that is needed is a pen and paper.
You can download the course resources (exercise sheets, assignments, PSD files, etc.) from the site, but you cannot download the video lessons to your computer.
Normally it costs $235/year. However, there is a special sale running now for a limited time: Save 75%! This means you can get an annual membership for just $59 USD/year.
If you purchase the annual membership at a discounted price, it will remain at that price for each consecutive year, so long as your membership is not cancelled.
If for any reason at all you are unhappy with our courses or feel it isn’t what you are looking for—then just fill out this form or email us at [email protected]. We’ll be more than happy to give you a full refund within 30 days of your first purchase. No questions asked. Just a guarantee you can trust.
You can easily cancel your membership renewal on your My Account page. Follow the prompts to cancel (Billing > Change Plan > Cancel Membership) and your membership will immediately be terminated. Please note: Refunds ONLY possible within 30 days after the date of purchase.
If you have more questions, please check out our Knowledge base or write to us here. We’re happy to assist in any way we can!
