Sale Ends Today! 75% off our annual membership. Get skills that fulfill.

 Bree Lee
Ever wonder why the foot is one of the trickiest parts of the body to draw?
The foot is a body part that we don’t look at often so it’s understandable that we’re unfamiliar with it! However, this lower appendage can show much personality in our characters and must be understood! Let’s take a look at some of the tips Reiq shares with us in the figure drawing section of our “Illustrator’s Guidebook 1” and demystify this body part.
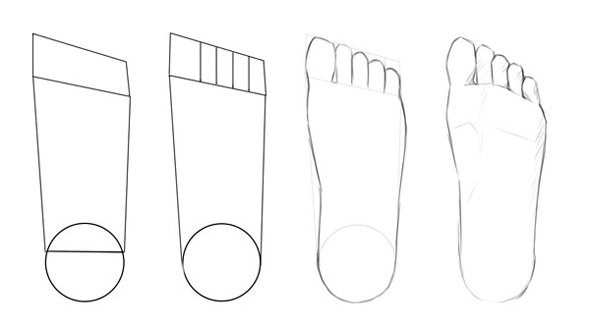
Focus on understanding how to draw the sole of the foot first! The sole of the foot gives us an overview of all of the main parts of the feet without needing to draw all of its complex parts. Once we have a good idea of what its frame looks like, practice drawing the foot in perspective! We’ll show you how in the next tip.
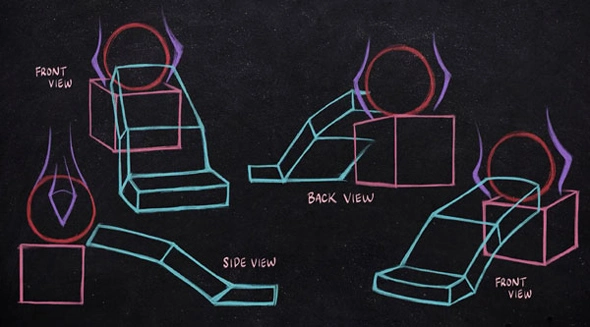
The foot seems complex at first but with just a few shapes, we can see the overall shape of the foot! Draw the heel as a cube, the ankle as a sphere, and the main part of the foot as three rectangular shapes. When you simplify it into basic shapes, drawing the foot becomes far more approachable!
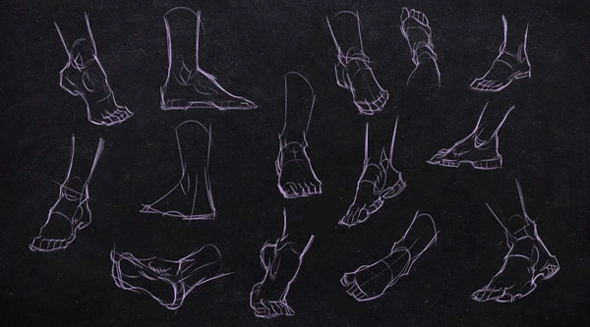
This exercise is best done with a reference. We recommend that you practice this until you’re comfortable. Then, try drawing the foot in the same angles with more details!

There are two bones in the ankle area: the fibula, located on the outside of the leg, and the tibia, placed on the inside of the leg. Since the fibula ends lower than the tibia (as shown in the photo), it pokes out below the tibia!
Now that we understand the anatomy, let’s simplify it! The two bones can be drawn as one simple shape like Neimy drew on the right-side of the photo. The most important thing to do here is to make sure that the ankle is drawn with the outside bone lower than the inside bone.
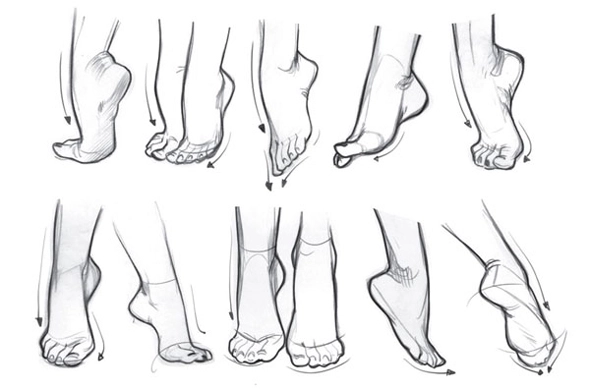
Since the foot is fleshy, when in contact with a surface, it’ll naturally flatten out! Be sure to keep this in mind and look for these contact points the next time you use a photo reference to practice drawing feet!
If you wish to further improve your anatomy, access our FREE figure drawing lesson on how to draw the head, in Neimy’s course “Figure Drawing”!
Bree Lee
Bree is a digital artist based in California. She enjoys helping new artists grow and loves to create artwork of her own.


 Gift Cards